|
Microscopy - Bees
On this page I want to provide details of what can be done using bees and a sharp knife......
In my opinion
there are two reasons to dissect honey bees, the first to diagnose disease
and the second, simply to see the inner working parts of a honeybee. With
this in mind, I will split this page into these two categories. The photos
have been taken by holding my mobile phone up against the eyepiece of the
microscope. At the end of this page are a number of
recommended books covering the
dissection and anatomy of honey bees.
Disease
Diagnosis
There are a variety of 'bee diseases',
(including Acarine and Nosema)
that can affect the bees to deferring extents. I will look at these
individually focusing in on the microscopic identification of the diseases.
A brief description of the disease will also be given.
If you are a
beekeeper, and would like me to examine your bees for Nosema and Acarine
please
contact me for
further information. A sample of at least 30 bees will allow both diseases
to be diagnosed. Photos of the samples can also be provided.
Acarine or (Tracheal mite)
This is a (now
rare in the UK) small mite that is found in the bees tracheae ('wind
pipes'), the mite is around 150x65μm in size. The disease can be found by
examining the tracheae, from around 30 bees under the microscope at x30-x40
to see the damage caused, and then at x400 to actually see the mites.
A
stereo microscope is used to view the bee whilst the dissection is carried
out, the dissection consists of removing the bees head and then removing a
'collar' to reveal the tracheae. Although sounding simple, it does take
practice to perfect.
The tracheae can then be mounted onto a microscope
slide and viewed using a compound microscope view the individual mites.
Further information is available on the
FERA
'beebase' website. I have included some photos taken showing some of the
key steps below.
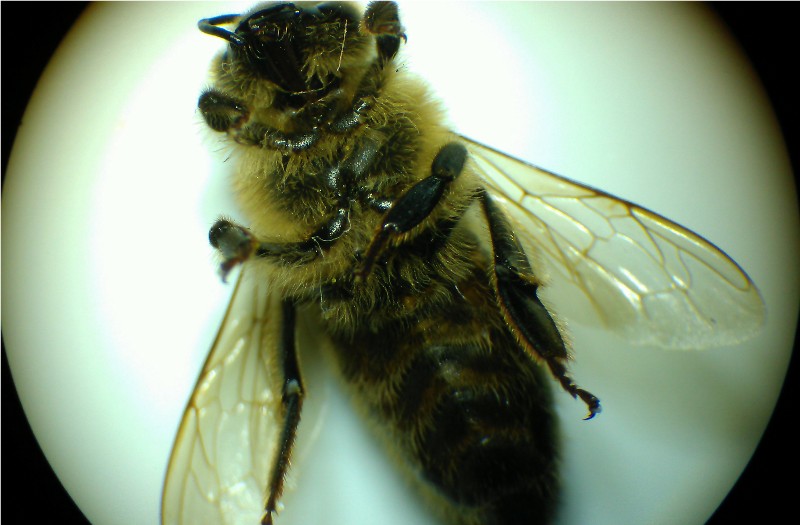
| One of
30 honeybee viewed at x10 ready to be mounted for dissection. |
 |
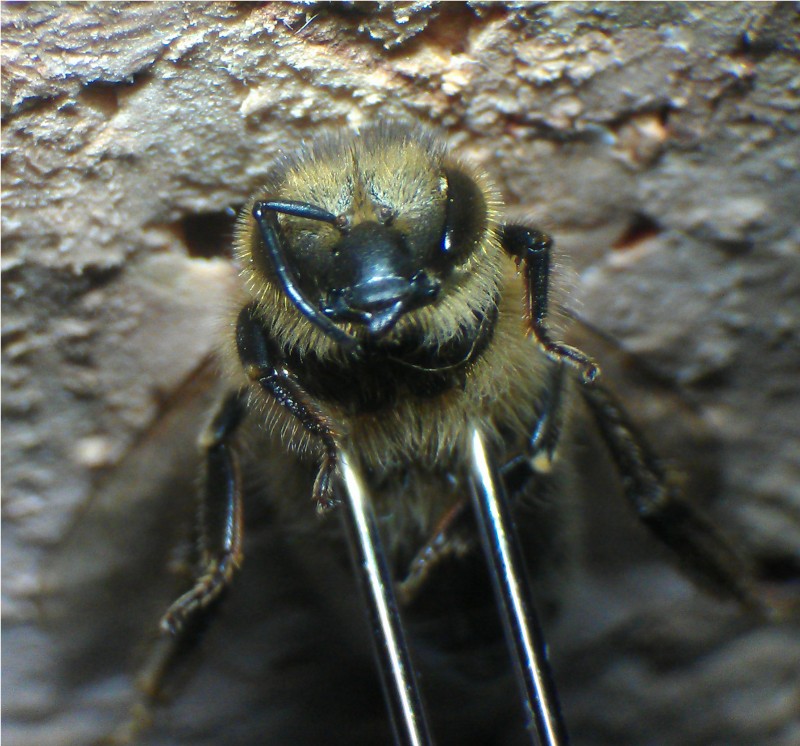
| Mounted onto a cork bung cut at approx. 60° Held in place by
the 'acarine needle'. |
 |
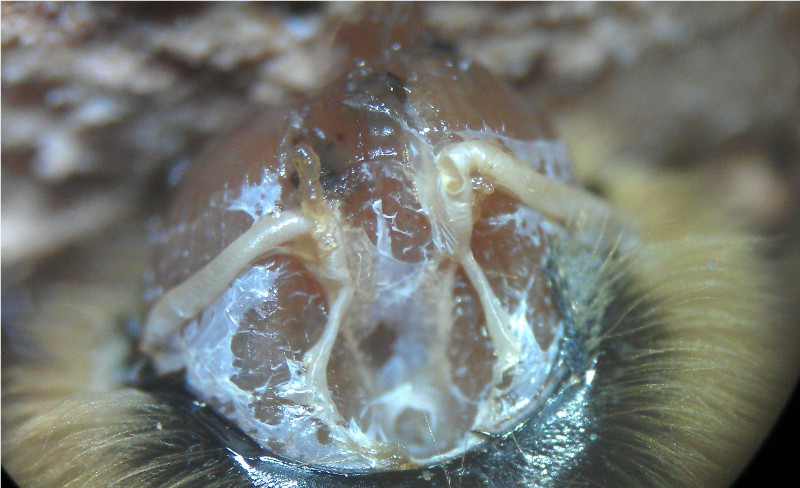
| Head of honeybee removed showing the collar with 'joint' located
at the bottom of the picture. |
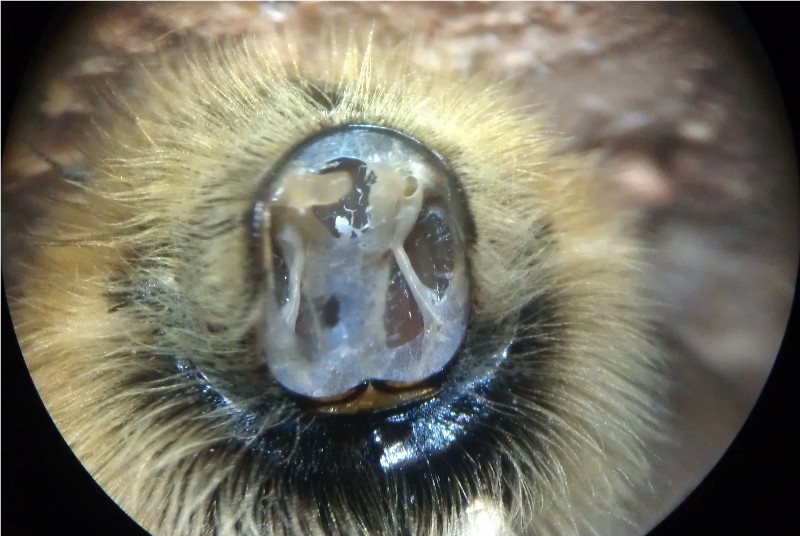 |
The collar
removed (using a scalpel starting to cut at the 'joint' and then
gently pulling away the collar). This step is where the fun begins,
a steady hand and care is required. Practice does make nearly
perfect in this step.
Once the tracheae are exposed, darkening
or staining on one or both sides indicates a possible Acarine
disease. Confirmation is made by removing the trachea and examining
at x400 to see the mites.
In case you are wondering, behind the
white tracheae, the pink 'salmon like' structure is the large flight
muscles attached to the bees wings. |
 |
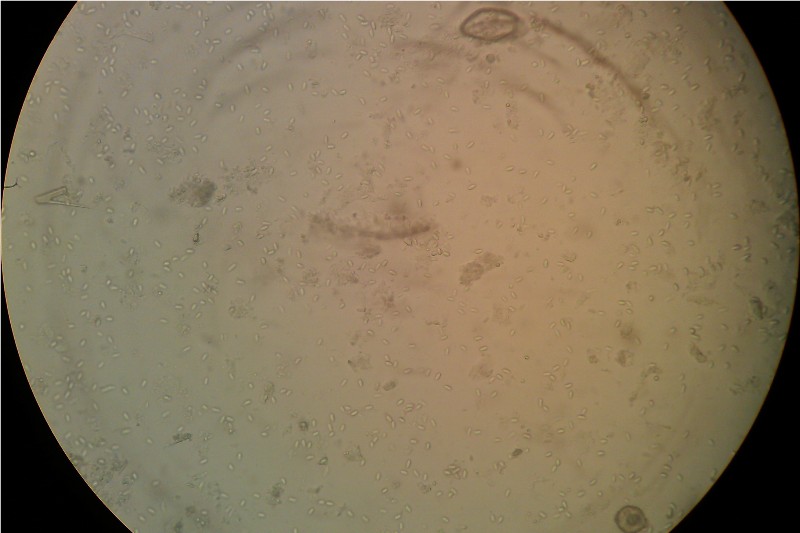
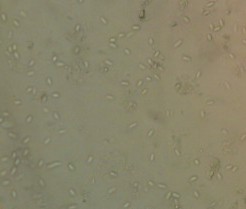
Nosema
This is a fungi, a spore forming
intracellular parasite. In other words something rather small ! The spores
reside in the bees gut, millions of spores can reduce the function of the
gut, resulting in reduce nutrient absorption and loss of defence against
viruses. The spores are approx. 6μm long, resembling 'rice grains' in
shape. This disease can cause significant problems to the beekeeper such as
reduced life span, poor spring buildup, and increases winter mortality. The
detection of the disease is by viewing a 'mashed up' sample of 30 bee
abdomens with a little water placed onto a microscope slide and viewed at
x400. Further information is available on the
FERA
'beebase' website.
| I have
include a photo showing what the spores look like viewed at x400.
This sample was created using the instructors bees whilst on a
KRSC recent microscopy course. |
 |
Books on Bee Anatomy
If
you are interested in dissecting honey bees, two books that I would recommend are given below.
The first provides a variety of colour photos and detailed descriptions on Bee Anatomy
The
second book is the 'standard textbook' for the dissection of honeybees,
this book not
only gives details of the anatomy, but also step by step guides to the
dissection of the honeybee. At the end of the book, a number of full
page drawings make the step by step guides easier to follow.
|
|